🎯 本記事のゴール
- パソコン初心者でも30分で「Hugo × GitHub × Cloudflare Pages」を使った ランニングコスト0円 ブログを構築
- 記事を書いたら 即自動公開 される仕組みをマスター
- 独自ドメイン取得 → SEO対策 → アクセス解析 まで一気通貫で習得
🚀 0. 全体フロー
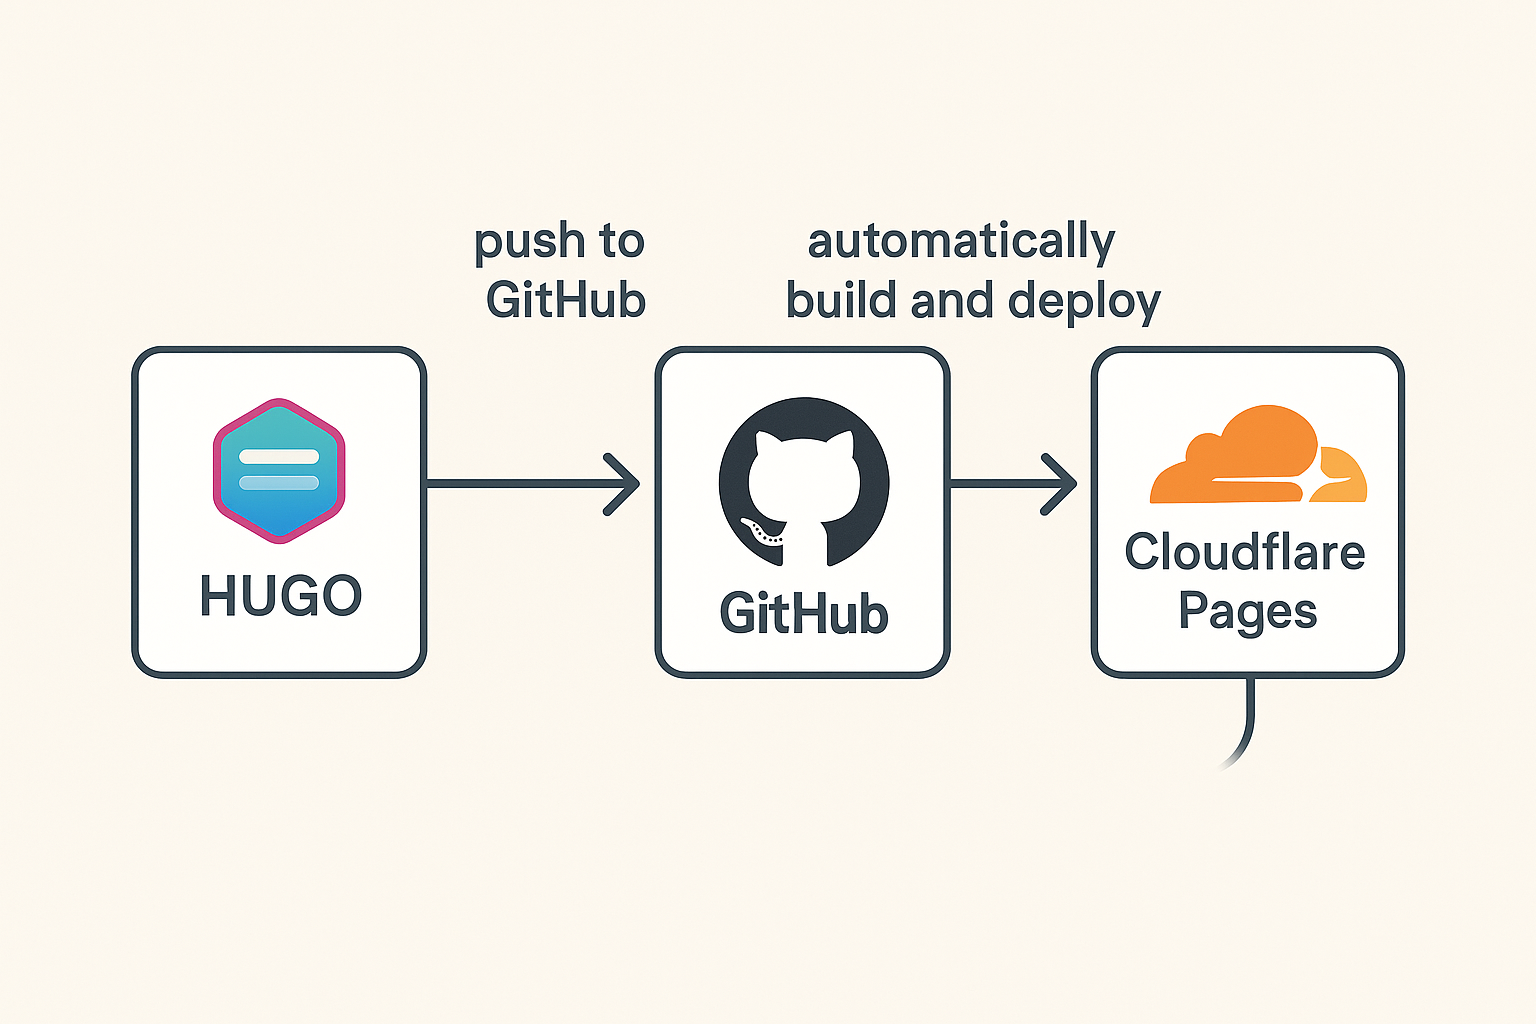
- 必要ツールをインストール
- Hugo でサイト骨格を生成
- GitHub にプッシュ
- Cloudflare Pages で自動デプロイ
- 記事を書いて
git push→ 即公開 - 独自ドメイン & アクセス解析を設定
🛠 1. 必要ツールを一気にインストール(約 15 分)
| ツール | 役割 | インストール(管理者 PowerShell) |
|---|---|---|
| Git | バージョン管理 | winget install --id Git.Git -e |
| Chocolatey | パッケージ管理 | https://chocolatey.org/install |
| Hugo Extended | 静的サイト生成 | choco install hugo-extended -y |
| Visual Studio Code | コードエディタ | winget install --id Microsoft.VisualStudioCode |
git --version          # Git インストール確認
hugo version           # “extended” が表示されれば OK
code --version         # VS Code 起動確認
💡 Tip: Chocolatey を使うと依存ライブラリも自動管理できます。
📦 2. Hugo サイトを 10 分で作成
# プロジェクト新規作成 〜 ローカルプレビュー
mkdir my-blog && cd my-blog
hugo new site . --format toml
git init
git submodule add https://github.com/adityatelange/hugo-PaperMod.git themes/PaperMod
echo 'theme = "PaperMod"' >> hugo.toml
hugo server -D      # ⇒ http://localhost:1313 で確認
⏱ 所要時間: 約 5 分 📱 ポイント: PaperMod は日本語フォント・モバイル最適化済み
📤 3. GitHub へプッシュ(約 5 分)
git remote add origin https://github.com/<YOUR_ID>/my-blog.git
git add .
git commit -m "feat: initial site"
git branch -M main
git push -u origin main   # PAT を入力
🔐 Security Tip: GitHub PAT は
Settings → Developer settings → Personal access tokens から生成。
☁️ 4. Cloudflare Pages で無料公開(約 10 分)
| 設定項目 | 値 |
|---|---|
| Framework preset | Hugo |
| Build command | hugo --gc --minify |
| Output directory | public |
| Environment variables | HUGO_VERSION=0.147.0, HUGO_ENV=production |
Save and Deploy → 数十秒で https://<project>.pages.dev に公開 🎉
🚀 裏技: --minify で CSS/JS を自動圧縮し表示速度アップ!
✍️ 5. 記事を書く → git push で自動公開
5‑1. アフィリエイトボタン(Shortcode)
layouts/shortcodes/affiliate.html
<a href="/go/{{ .Get "slug" }}" target="_blank" rel="noopener noreferrer">
  <button style="
    background:#ff8000;
    color:#fff;
    padding:10px 20px;
    border:none;
    border-radius:5px;
    font-size:1rem;
    cursor:pointer;">
    {{ .Get "text" }}
  </button>
</a>
5‑2. 新規記事テンプレート
hugo new posts/first-affiliate.md
content/posts/first-affiliate.md
---
title: "お名前.comで独自ドメインを0円で取得する方法"
date: 2025-04-29T16:00:00+09:00
tags: ["独自ドメイン", "副業", "初心者"]
---
Webサイト運営の第一歩は独自ドメイン取得!
以下のボタンから今すぐ無料登録しましょう👇
git add content/posts/first-affiliate.md
git commit -m "feat: add first-affiliate post"
git push
Cloudflare Pages が自動ビルド → 数秒で公開完了 ✅
🌐 6. 独自ドメイン & GA4 設定
| やりたいこと | 操作 |
|---|---|
| 独自ドメイン | Pages → Custom domains → ドメイン名を入力 → DNS レコード自動作成 ✔ |
| アクセス解析 | googleAnalytics = "G-XXXXXXX" を hugo.toml に追記 |
[params]
  googleAnalytics = "G-ABCDEFG1234"
📈 SEO Tip: title, description, images を設定して CTR を向上!
⚠️ 7. よくあるトラブル & 解決策
| 症状 | 解決策 |
|---|---|
| 404 エラー | baseURL が間違い → hugo.toml 修正 → 再プッシュ |
| テーマが反映されない | git submodule update --init --recursive → 再デプロイ |
| Hugo Extended が必要 | HUGO_VERSION を Extended 対応版に(例: 0.147.0) |
| Shortcode が出ない | layouts/shortcodes 内に .html があるか確認 |
🎉 まとめ:今日から副業ブロガー!
- 手順 30 分 でゼロ円ブログ完成
- ランニングコスト 0 円 でサーバーレス運営
git pushだけで永久自動公開
思い立ったが吉日! 今すぐ行動して、あなたも副業ブログで収益化への第一歩を踏み出しましょう! 🚀